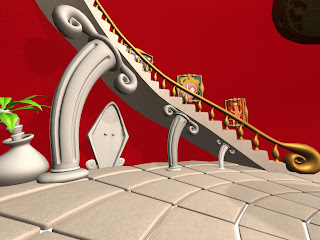
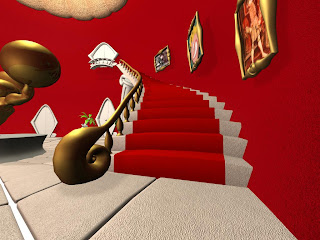
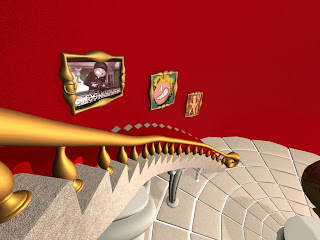
I felt so annoyed because I have spent way too much time getting these stairs right (a total of 6 staircases had been modelled up until this point - all in different ways!) let alone texturing them, and frustration took over me. I resorted to starting over, with the aid of my very helpful and knowledgeable collegue - Alec. Below is a tutorial on how I created my new fab stairs. I give total creative rights to Alec who invented the process:
I started the staircase with a preset ring polygon shape, subdivisions x40.
I then deleted 3/4 of the ring leaving me a rectangular curved quarter.
I set upon extruding each individual face 1 unit high until I had a fairly simple and beutifully smoothed encased stairwell.
I then used the split polygon tool to draw in where I wished the edge of the casing to end, and deleted uneccessary faces.
I was then left with the bare structure of the stairs ready to be given a bottom ceiling. I selected the inside boarder edge of the stairs and extruded inwards to achieve a totally smooth undercasing plane. Already it was looking sooo much simpler and easier to work with.
The next step was the round the stairs and give them the shape I desired by inserting just 2 edges loops down the middle to act as my height curvature. Aswell as raising the verts of these new edges, I selected the faces of the inner section and extruded to form my red carpet!
I then selected the outer edges and corners of each step and beveled them to a value of 2. This bodged up slightly at first however after changing the normal value to 57 rather than 30 everything seemed to just work. First time I had ever dealt with the word normal in maya, and i'm still not exactly sure how it fixed my problem. Something to do with only smoothing angles larger than 90 degrees or something? A new tool was learned anyhow.
Next it was just a case of using a simple 4x4x4 lattice to slightly reshape the stairs to fit the curvature of my dome room, so they overlapped the walls and sat flush. I textured them by simply selecting the faces I wished to be stone, automatic mapped them, applied my grainy stone, selected the faces I wished to be carpet, automatic mapped them, and applied my carpet texture.
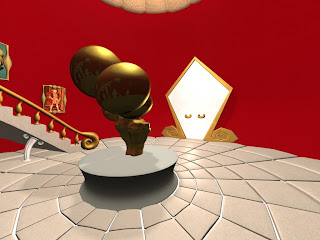
Sounds long but it was in fact 100 times quicker than any method I have used to date. To create my bannister I simply duplicated the individual rails, placed them on each step, and then used the extrude face to curve tool to create the rail itself. I attached the big swirl to the end which gave it a nice touch and stayed truthful to my design. The whole thing was topped off by placing the coloumns in my scene under the new staircase to act as the supports as I had wished. I am very very happy with the new stairs, and now all I have to do is mirror them for the other side of the room. Below are some screenshots of how they turned out:


I still need to edit the bump depth on the stair stone texture. Adjust the bannister slightly, aswell as its gold texture (add a grain). I tested having 3 coloumns beneath the staircase prodding it up, however I think just 2 is suitable as the 3rd looks ridiculously small and wierd! Ihave to create the circular balcony landing in between the two stairwells however that will take 5 mins as I will use a flat cyclinder and match up verts. You may have noticed I also had time to import daves front door which he modelled today. Made it huge, and slapped a couple of test colours on it to get an idea of how it will look.
So yeah, been in all day and I'd say 10am - 3pm was unproductive and time wasted, but 3pm - 6.30 was where the magic happened. Hope tommorow goes swimmingly ...
No comments:
Post a Comment